
I have a dream.

... a dream where all my furniture wears a slip.
...dreamy in creamy skirted fabric.
Today I took one step closer to that dream
with the completion of my very first drop cloth slip cover.
with the completion of my very first drop cloth slip cover.
The project itself did not take very long.
My motivation and confidence to start did.
The drop cloth lay draped over the chair for about 4 months.
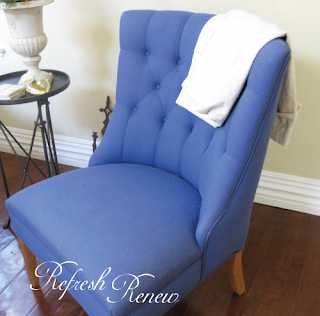
It is a cute chair. I love the tufts.
But I wanted to "quiet" the blue color with a slipcover
until it can be properly recovered.
My motivation and confidence to start did.
The drop cloth lay draped over the chair for about 4 months.
It is a cute chair. I love the tufts.
But I wanted to "quiet" the blue color with a slipcover
until it can be properly recovered.

Then, all of a sudden, one evening, it struck.
Inspiration.
I grabbed scissors, some long pins, and
shed my fear of "making a mistake" and just started.
I pinned.
I cut.
I sewed a semi-straight line.

And I ripped out some stitches.
And sewed again.
And sewed over.
But--in less than 2.5 hours...it was done!
And while she definately has a "good" side that is better than the other...I have to say I am quite proud of my first venture into heavenly slipcover bliss. :o)
Here's a quasi tutorial to encourage those
who may be too faint of heart to begin too:
who may be too faint of heart to begin too:
Step 1:
Buy some long pins.
You need them.

Step 2:
Read some tutorials.
These really help.
I did a while ago...but did not think to review them when inspiration struck.
{I know better...I would have spent the night reviewing instead of sewing.
So my suggestion is to time your reviewing and inspiration close together.}
Step 3:
Lay your fabric out and cut and pin to the shape of your chair.
To make it easier, I visualized the slipcover in sections.
I cut the skirt part first and pinned directly to the chair.
It is basically a big rectangle that wraps aound the bottom.
I cut mine longer so I could have some pleats around the legs and back.

Then I cut out the seat part...leaving an allowance of at least 1/2 inch.
Next I cut the front and back parts of the chair.
These were the toughest because the back is curved.
I was not exactly sure how to "cut" it so I started big
and pinned and trimmed.
I put my pins close to the chair edge-this would become my sewing line.

Here's how it looked when I was finished pinning and cutting.
I liked it.
A little loose because of the curved back...
but I knew if I allowed myself to get frustrated over that,
it would not get done.
Ever.
but I knew if I allowed myself to get frustrated over that,
it would not get done.
Ever.
So I took it off and started sewing my pin lines.
I started with the back,
then added the seat
and finished with the skirt last.
I fitted it after every seam sewn.

Here was a fitting.
{Pumpkin, my biggest fan, liked the slip before it was even finished.}

Here are my "show-off" pics.
:o)

The back with planned pleats and tucks.

Do you like my "HOME" burlap pillow?
{I will be blogging about this soon.}

I learned a lot from this project....
most of all...don't be afraid to try something and mess up.
The mistakes can usually be fixed,
and most of the time only you notice anyway.
{plus dropcloths are easy to get more of.}
I will be trying my skills out on another piece,
...when inspiration strikes.
:o)

sharing with:
The Scoop Party at Cedar Hill Ranch
It looks terrific! I love your HOME pillow too :)
ReplyDeleteTurned out beautifully, you really did good! Thanks so much for sharing at AMAZE ME MONDAY...
ReplyDeleteBlessings,
Cindy
You did a great job! I love that look - it's warm and inviting and says "I want you to be comfortable"! Thank you for the inspiration - I just painted my dining room set with Old White from Annie Sloan and I was thinking of making seat cushions out of drop cloths and now you have just convinced that's exactly what I will do! Thanks for the inspiration! Have a beautiful and peaceful day! :-)
ReplyDeleteit looks great, aimee! love the home pillow, too:)
ReplyDeleteSlipcovers have always intimated me. Yours looks great. I would love for you to share at the Bacon Time linky, if you have not already.
ReplyDeleteSo clever to make this out of drop cloth, and it looks fantastic in your room! I chuckled as I was reading, because leaving it for four months is exactly what I would do! Ha! Thank you for linking up with Inspired Sunday. It is so nice to visit with you!
ReplyDelete